A Celebrity Hairstylist Just Showed Me How to Do the Perfect Slicked-Back Bun
A celebrity hairstylist showed us exactly how to get the perfect slicked-back bun every time. Here's his step-by-step guide to a sleek bun hairstyle.
Welcome to How to Hair. Think of this series as your go-to guide to achieve your best hair yet. Whether you want to master a certain hair tool, work out how to wear a new hairstyle or if you're just in need of some hair inspiration, our beauty editor Eleanor Vousden is here to talk you through what you need to know, step-by-step, with plenty of insider intel along the way. Allow How to Hair to become your trusted guide on the journey to great hair days—every day.
If you're wondering how to do a slicked-back bun hairstyle, you've come to the right place. This seemingly simple updo hairstyle looks easy, but it can prove tricky without a little know-how. However, mastering this hairstyle can come in handy. It's a great updo for times when you've skipped hair wash day (again), or want a sleek and elegant look for either day or night. Truly, the versatility of a slicked-back bun hairstyle knows no bounds.
So, how do we achieve the slicked-back bun of dreams? I've enlisted the help of Luke Hersheson, celebrity hairstylist and founder of Hershesons (who also tends to the hair of Victoria Beckham, Sienna Miller and Iris Law, to name but a few of his celebrity clientele), to share his top tips for achieving a perfectly sleek bun at home. Scroll on for his step-by-step guide, the top tips and the best products to achieve the sleekest bun ever.
How to Do a Slicked-Back Bun

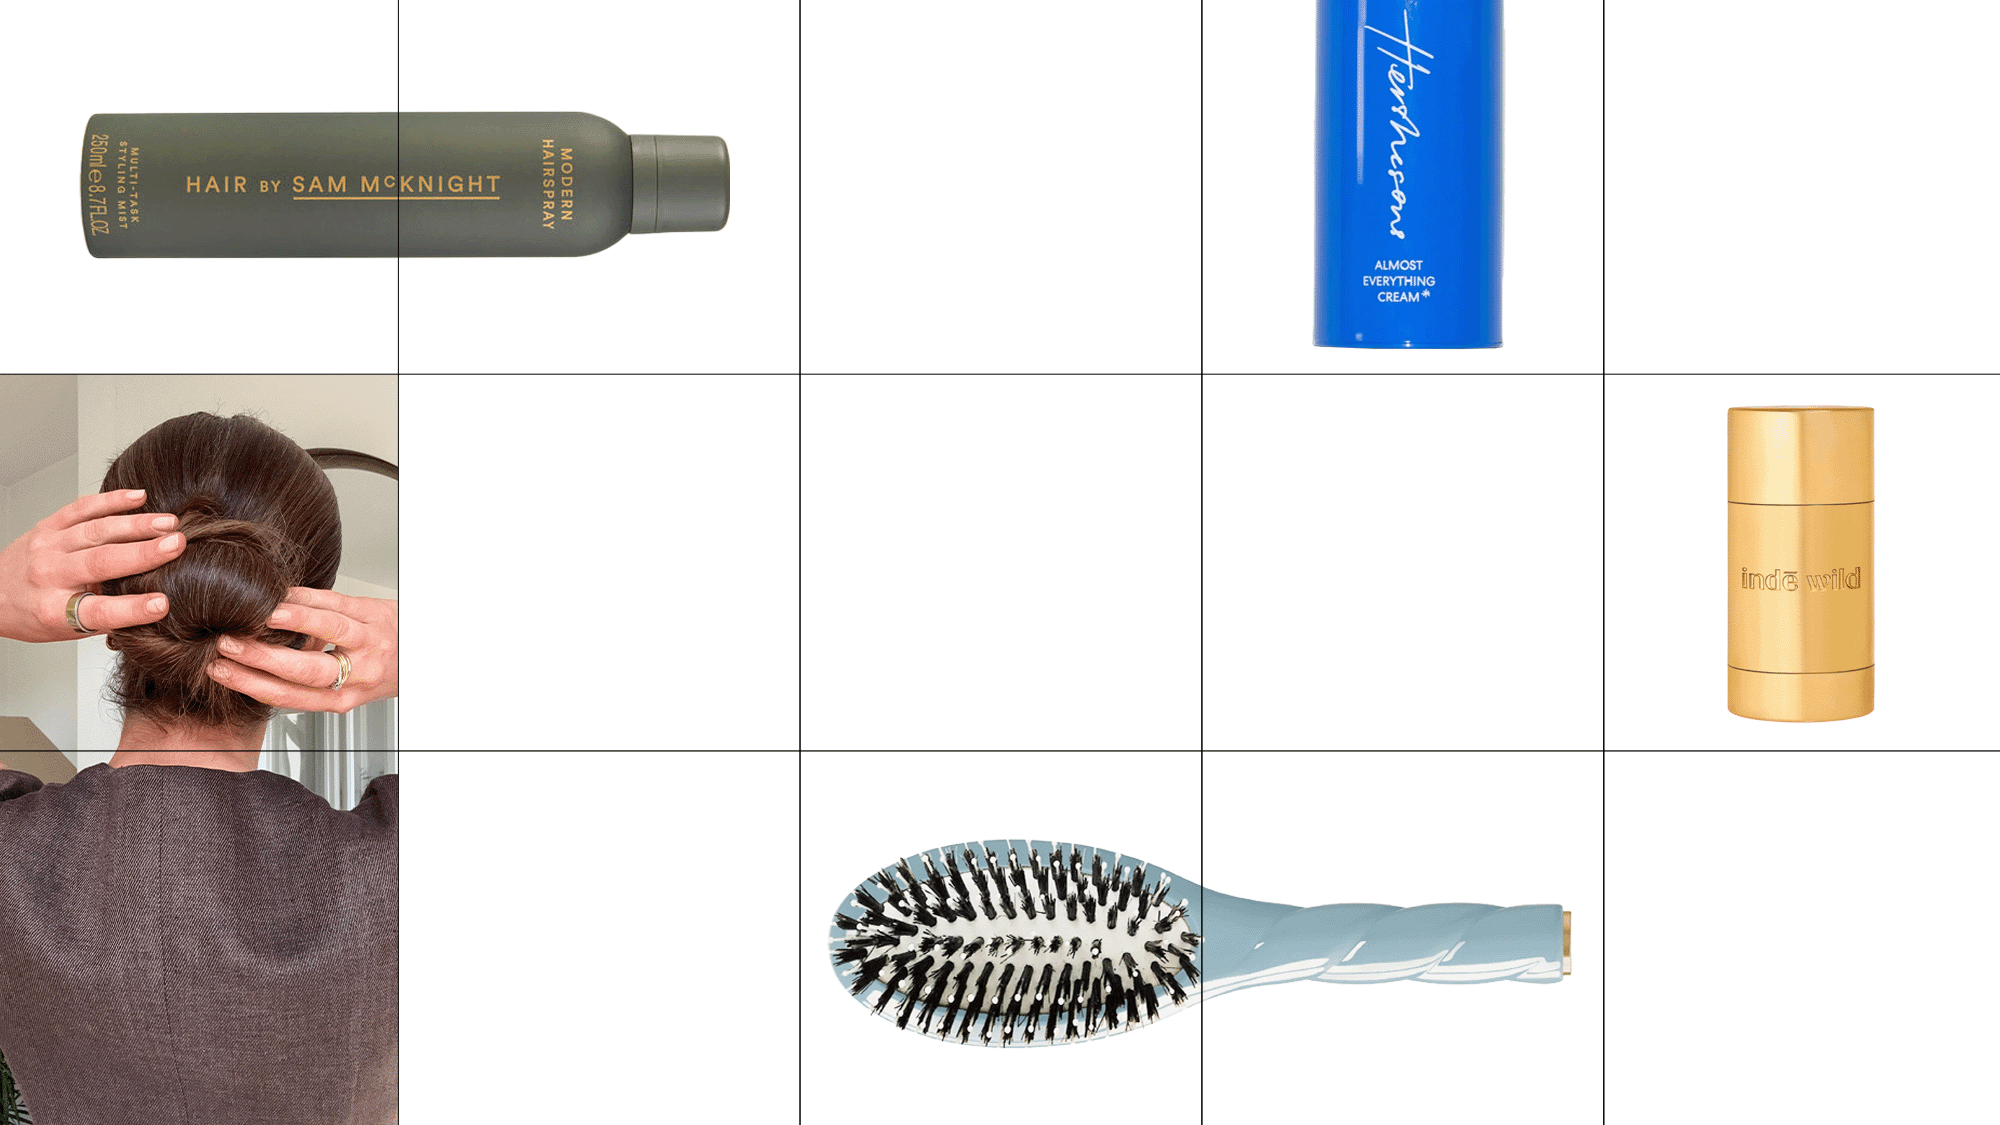
Before you begin, there are a few tools and products you will need to get a professional-looking finish. "For this look, I recommend a mixed bristle brush, a styling cream like Hershesons Almost Everything Cream (£25), a texture spray, Frenchies hair pins and a hairspray like Got2b Glued Hairspray (£6)," says Hersheson.
"Second-day hair is ideal, especially if it’s already straight. Natural texture helps the product grip and hold the shape better than freshly washed hair," he says, so forgo your shampoo, as a little bit of oil will help to hold the hair in place.


1. Prep Hair
Begin with dry hair. If your hair is slippery or freshly washed, you can mist through some texturising spray to help give the hair some grit and hold. I'm using Oribe's Dry Texturising Spray (£47) through my lengths for extra grip.
2. Choose Parting
Next, it's time to choose your parting. "The parting completely changes the character of the style," says Hersheson. "No parting feels more androgynous and editorial, a side parting gives a slightly boyish, directional feel and a centre parting reads softer," he says. "The position of the bun also plays a role; lower buns feel more classic and polished, while higher placements feel more lifted and sportier."
3. Section Hair
If your lengths are on the longer or thicker side, it can be helpful to section your hair into two parts to help get a smooth finish and minimise bumps. Here, I've separated my hair into a top section and a bottom section with my tail comb, the latter of which I'll slick back into a ponytail first before repeating with the top section.
4. Apply Pomade
"Apply Almost Everything Cream generously through the lengths and roots," says Hersheson. This will help to provide hold and allow you to achieve a sleek and shiny result.
5. Slick Back
"Brush hair back (or into your chosen parting) using a mixed bristle brush, keeping tension firm to eliminate bumps," says Hersheson. Look for a hair brush with boar bristles that are densely packed together, as this will help to tuck all the hairs into a smooth finish. "Continue brushing until the hair sits flat and close to the head," he says. "Curly or coily hair requires more intensive brushing and product to get the hair as flat and compact as possible," he says.
6. Tie Hair
"Gather into a ponytail at your desired height, ensuring it stays tight and controlled and secure with an elastic. Keep the hair balanced and neutral in placement so the nape doesn’t drop or sag throughout the day," says Hersheson.
7. Slick Back Front
Next, you can repeat the sam process with the front section to join the ponytail, using a pomade and your brush to smooth the sections into place.
8. Twist Into Bun
"Twist the ponytail and wrap it around the base to form a bun and pin or secure the bun in place," says Hersheson.
9. Smooth Flyaways
If you have any shorter layers that don't quite reach or stubborn flyaways, Hersheson has some tips to remedy them. "Shorter pieces need extra control," he says. "Use more product and apply heat where needed to set those sections in place so they don’t shift or pop out." I like using a hair wax stick to provide more targeted control and boost the glossy finish.
10. Apply Hairspray
As a final step, you can then finish with hairspray for extra hold and gloss.
The Result
And there you have your slicked-back bun. It should feel secure, but never too tight, and last all day. For extra hold, you can go in with another blast of hairspray to ensure your slick-back bun stays in place all day and night.
Shop the Look:


