My Best Low-Maintenance Beauty Tip? Tint Your Eyebrows at Home—Here's How
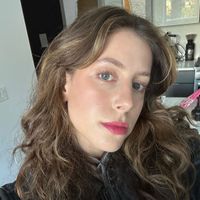
I am particular about my brow tints. My natural arches are very thin and sparse (they have been since I was a child—no tweezer horror stories here!), and they're so light that they basically disappear in the sun. I like to say I had bleached brows before they were cool, only mine appeared alien-like all on their own.
I finally discovered eyebrow tinting in my early 20s, and no lie, it transformed my entire face. So I try to see Joey Healy, my NYC-based brow wizard, every six weeks for a refresh—the operative word being try. What can I say? Sometimes I just can't get up the gumption to embark on the 30-minute trek, wimpy brows be damned.

Luckily for me, I recently learned how to tint my own eyebrows in the comfort of my own apartment, and it has totally changed the game. No, it doesn't yield the same results as my IRL salon visits (Healy, you'll see me soon!), but it does hold me over in between appointments when my arches desperately need some semi-permanent color. Plus, I received a full tutorial from Healy himself, along with celebrity brow stylist and founder of Brow Code, Melanie Marris—and if you're going to commit to the at-home venture, it's best to do so with an expert stamp of approval.

Brow tinting novices, don't be nervous! Here, I'll walk you through the step-by-step routine I personally follow every few weeks.
How to Tint Your Eyebrows at Home
1. Grab the Right Materials
First thing's first: Assemble your supplies. You'll need some actual brow dye (peep our recommendations below), which typically comes in an at-home kit along with some sort of activator, applicator brush, and mixing dish. You could theoretically use beard dye to tint your eyebrows (that's a story for another day), in which case you'll want to grab your applicator—a fine, angled makeup brush will do. You'll also need cotton swabs, tissues, and some sort of barrier cream (like Vaseline).
2. Prep the Skin
"Before starting the tinting process, it is essential to thoroughly cleanse your brows to ensure optimal results," explains Marris. "Use an oil-free cleanser to remove any makeup or impurities from your brows." You'll want to make sure your brow hairs are completely dry and clean, as water and oil (from makeup, sunscreen, or sebum buildup) can interfere with the tinting process.
3. Mix Your Shade
When choosing your shade, Healy recommends selecting a slightly lighter shade of dye—especially if it's your first time with the DIY venture. "It's better to have a lighter color process for longer than to have a color that's too dark and processes too soon," he explains. "You can always build the color and do another round, but you can't work backward, as it takes time for it to fade."
The mixing instructions may vary depending on your at-home kit, but generally, you'll want to blend a pea-sized amount of dye with the activator provided in a small dish. Use your application brush to combine the two until it forms a creamy paste. "As you mix, you'll notice the paste gradually darkening," Marris shares.
4. Apply the Dye
Before applying the dye, dip a cotton swab in Vaseline (or whatever oily barrier cream you have) and trace the outline of your brows. Again, anything oil-based will keep the dye from adhering to the skin or hair, so the border helps you from staining your skin. (Although, if you do accidentally tint your skin, you can course correct—more on that later.)
Next, dip your application brush into the dye mixture and cover all the hairs you wish to color. Marris recommends using a clean, dry cotton swab to blend the tint through the brow and clean up the edges for a precise shape.
5. Let It Process
"Processing time is where the magic really happens," says Marris. Each kit will have its own processing guide, so it's best to follow the manufacturing instructions. Generally, though, the longer you leave the dye on, the darker your brows will become, so Healy recommends erring on the early side. After all, you can always go back in for another round if you'd like them darker—you can't strip the dye off the hairs!
"Sometimes in the brow studio, it’s left on for 6 minutes, and sometimes it’s left on for 20 minutes. If people have white, gray, or thick, coarse hair, these take longer to take the color," he says. Once you have your tinting routine down pat, you'll know how long it takes for your arches to reach your desired color; before then, it's best to go slow.
"My recommendation is [to] go through the whole brow once, leave the dye on for half the time it says, and take it off without throwing it out. Take it off with the brush, and put it back in the cup it came with so you can reapply it," Healy adds. "You'll understand the dye better this way."
6. Remove
After the allotted time is up, use a damp cotton round to remove the dye. "Gently wipe the tint off by sweeping outward toward the edge of your face," Marris advises. "Avoid scrubbing back and forth, as this can remove the skin stain." See, brow dye doesn't only tint the hairs themselves; it colors the patches of skin in between hairs, too, which makes your brows appear fuller overall.
7. Repeat (If Necessary)
Once you wipe off the tint, you can assess where you might need to repeat a second round. You might want to repeat the process for the entire brow, or you might want to enhance a specific portion, like the arch or tail.
"Often, people need more time processing at the beginning of the brow, at the little sprouts, or tails," Healy notes. Feel free to spot-dye those areas, making sure to retrace the whole brow with Vaseline once more to avoid staining the surrounding skin.
Pro Tips for Best Results
Looking to level up? Here are some expert tips Marris and Healy swear by:
Achieve an ombré effect: "For an ombré effect, remove the tint from the beginning of your brows a few minutes earlier than the ends. This will make your brows look more natural," says Marris. "For instance, if your total processing time is seven minutes, remove the fronts after three to four minutes and blend the remaining tint gently to soften any lines, creating a gradient and more natural effect."
Keep them dry: "For the rest of the day, it's better to avoid excessive sweating, like hot yoga and saunas," notes Healy. You technically can get the brows wet post-dye, but intense heat right after tinting probably isn't a good idea.
Avoid exfoliating the area: To prolong the tint, both Healy and Marris advise against exfoliation (scrubs, AHAs and BHAs, retinol, etc.), as it can speed up fading. Treat your skin similar to how you might after self-tanning. Gently with ample hydration.
Warnings and Troubleshooting
It's the most common follow-up question: What happens if I accidentally dye my skin? "If you used a barrier cream, like Vaseline, you wouldn’t," says Healy. But if you somehow did, don't freak out—just use a micellar water-soaked cotton swab to gently buff away the excess tint.
Marris also offers a gentle Tint Remover for this very purpose, but the dye will also naturally fade from your skin on its own. "While the tint in the hair will remain, remember it’s a semi-permanent color and will naturally fade [from your skin] over about a week," she advises. So try not to fret!
As for side effects, there aren't many, as long as you don't have any allergies or sensitivities to the dye itself. "If your eyes are highly sensitive, you can do a patch test on the wrist by the pulse point or behind the ear. Put a little dye and see if you react," shares Healy.
If you have any scarring on the brows, Marris points out that the dye will not last on those areas (while it clings to the hairs themselves, the dye easily fades from the skin). "Otherwise, I have not yet met anyone who does not love a brow tint, and I have personally styled over 60,000 eyebrows!" she adds.
How Long Do At-Home Tints Last?
"With proper aftercare, at-home brow tinting lasts seven days on the skin and up to three to four weeks on the brow hairs," Marris says. (If you have very oily skin, however, she notes the tint might not last as long.) Professional tinting typically lasts four to six weeks, so the at-home timeline can certainly help sway you over between appointments. You might notice some areas fading faster than others—like the tails—so you can always touch up those spots as you please.
Best Brow Tinting Products

This is the brow tinting kit I use. Created by Marris herself, it comes with everything you need (dye, activator, mixing dish, brush), along with a QR code that links to step-by-step instructions.

In a pinch, you could totally pick up some beard dye at your local drugstore or on Amazon. Beard dye is meant for facial hair, so it's typically gentle enough to use on eyebrows. It may take some more investigation to determine your right shade, but the overall tinting process is pretty similar. "It should come with everything you need in terms of dye and activator," says Healy.

For those who don't feel like investing in the whole DIY process (that's fair), this Maybelline peel-off tint provides a happy middle ground. Just paint the gel on your brows wherever you'd like to cover, let it set, then peel it off with your fingers once it's dry. It leaves behind a natural-looking tint that lasts for up to three days, so it's great if you want quick, immediate results.

Similar to the Maybelline number, Hally's Brow Pal features a doe foot applicator to subtly tint your brows for three to five days. It's a breeze to apply—just paint, wait for 10 or so minutes, then wipe off the lingering pigment. Plus, it comes in three gorgeous shades (including a fun navy!).

Introducing my new favorite tinted brow gel. You've probably heard of tubing mascaras, which create tiny, tube-like coats around each eyelash to provide water-resistant, long wear. This formula follows a similar logic—only instead of your lashes, the tubes wrap around each brow hair. Fascinating, no? It's great for someone like me, who has very thin, light arches, as the gel makes my brow hairs naturally look way thicker.

I also love brow powder for a soft, diffused look, and Healy has the best ones in the game, IMO. The Corduroy shade is the perfect cool-toned hue to give my brows the dimension they need without looking too "painted."

This kit literally takes all the guesswork out of the equation. Simply align the correct stencil with your brow shape (there are 10 to choose from), and then stamp the powder-filled sponge along the contours until you reach your desired color payoff. Swipe off the excess with the provided spoolie, and you'll wind up with expertly groomed brows.

Anything named a "mousse" just sounds comfortably hydrating, and this pot of waterproof brow color doesn't disappoint. The formula feels super conditioning on the brow hairs, with a lightweight texture that allows you to easily fluff the hairs to your liking. Once it sets, though, it lasts all day long.
