Getting Baby-Smooth Skin Is Easier Than You Think—Here's Your Step-By-Step Guide

Whether it’s LED face masks, microcurrent devices, or facial toning tools, we have endless options when it comes to involved DIY skin treatments. One such treatment is dermaplaning, a skin-exfoliating and hair removal technique that has been popular for the past few years, but has gained even more attention thanks to the billion-plus views from TikTok beauty aficionados. While dermaplaning is a service offered by a licensed aesthetician or at your dermatologist’s office (typically with a small scalpel), there are various at-home dermaplaning tools that can give you the same smooth-as-a-baby, fuzz-free appearance.
If you’ve ever had a professional, in-office dermaplaning treatment, you’re probably already aware of the easy, painless (and soothing—I fell asleep once!) process, and how soft and smooth your skin can feel afterward. Earlier this year, Gabrielle Union’s makeup artist shared an at-home dermaplaning tool to prep the actor’s skin for makeup before she attended the Billboard Music Awards. In fact, one of the best things about dermaplaning is that it can give you smoother skin, allowing your makeup to be applied more seamlessly. Even better? It’s something that you can easily do yourself. All you need to know are a few do’s and don’ts when it comes to wielding your own dermaplane blade. Keep scrolling for our easy-to-follow guide you can use at home.

The 411 on Dermaplaning

"At-home dermaplaning is the perfect way to exfoliate your skin in seconds, remove excess hair and dead skin to give you a clean and clear canvas,” says Karina Sulzer, an aesthetician and founder of Skin Gym and Skin Camp. That said, it’s important to keep in mind that dermaplaning is much more than shaving your face. You can’t get the same effect with a regular razor, as a dermaplane razor usually uses a smaller blade.
The Benefits of At-Home Dermaplaning

There are lots of pros to using an at-home dermaplaning tool. If you have a lot of vellus hair, aka peach fuzz (raises hand), you can expect all of that to be gone, at least, until it grows back. (BTW, pay no mind to the old wives’ tale that hair grows back thicker and darker after shaving. It’s truly a myth!)
According to Sulzer, dermaplaning can help improve overall radiance, smoothness, and texture, which is great news if you’re dealing with annoying, uneven skin texture or your complexion could use a brightening boost. Sulzer also points out that not only does the practice remove facial hair, but all of the dirt trapped in there as well, revealing baby-soft clear skin. "Not to mention, by removing all of that dead skin and fuzz, your skincare products automatically become more effective because they can penetrate better,” she says. Some also believe dermaplaning can help with fine lines and wrinkles.
What Skin Types Are Best for At-Home Dermaplaning

According to Sulzer, dermaplaning is great for all skin types. "Those with oily skin will super love their dermaplaning tool, as it helps to remove excess oil that can clog your pores while also helping to prevent future pimples from forming,” she says. Now, if you have sensitive skin, skin conditions such as eczema and rosacea, and active breakouts, you should probably avoid dermaplaning. As always, it’s best to ask your dermatologist before attempting it if you’re unsure.
Potential Risks of At-Home Dermaplaning

If you’re someone who uses chemical exfoliators or physical scrubs on the regular, tread carefully with dermaplaning since too much exfoliation can damage your skin barrier. The best thing for anyone to do is to avoid using both physical and chemical exfoliators for about a week prior to dermaplaning, as well as any acids or retinoids. Not to mention, Botox and fillers should be scheduled after you plan to dermaplane. Other risks include the possibility of ingrown hairs (as with any type of hair removal) and the chance that you could get nicked by the tool.
How to Safely Dermaplane At Home

To prep your face for an at-home dermaplaning sesh, you’ll want to make sure your skin canvas is clean and ready to go. "It’s important to have a clean slate before dermaplaning,” says Sulzer. "Grab your favorite cleanser and remove every trace of makeup. This will help us get at the root of the fuzz.” (Note: a gentle cleanser is probably best.) You’ll also want to dermaplane your face while it’s dry, so no need to add any oils or creams like you do when you’re shaving other parts of your body.
Carefully read the instructions for the specific dermaplaning tool you plan to use. Then, holding your skin taut, you’ll want to make light, upward or downward strokes in the area you want to treat, avoiding sensitive areas like the eyes and lips. If you’re using Skin Camp’s at-home dermaplaning tool, Sulzer says that it features gentle, high-quality precise blades to make the process easy and beneficial. "Make sure to follow all instructions and hold the tool at a comfortable angle,” she says. "You want to make sure to work with a fresh, sharp blade every time so make sure to replace after a few uses.” (Good advice for any dermaplaning tool.)
What to Do After You Dermaplane

Following your dermaplaning session, you can indulge in your moisture-packed serums, moisturizers, and potions since they’ll be able to penetrate the skin much deeper. As Sulzer says, "Focus on hydration.” Use products with hyaluronic acid or soothing gel masks to supply even more nourishment for your dermis—-and don’t forget the sunscreen! "Avoid direct sun exposure for a few days and no makeup until 24 hours after your dermaplaning session,” advises Sulzer. Finally, remember that dermaplaning isn’t something you’re going to be doing every day, or even weekly. It’s best to wait about three to four weeks between at-home treatments, so you’ll have a fresh batch of peach fuzz and dead skin cells ready to slough off next time!
The Best At-Home Dermaplaning Tools to Try
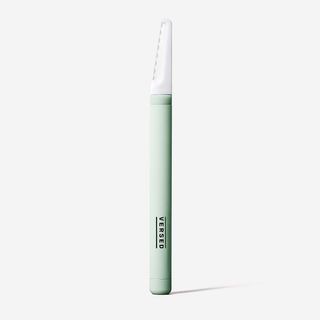
Not only does it have a cute name, but Versed’s at-home physical exfoliation tool is also made with a slip-free grip for better control (it was inspired by the iconic X-Acto Knife!). It also comes with two blades that can be used four times.
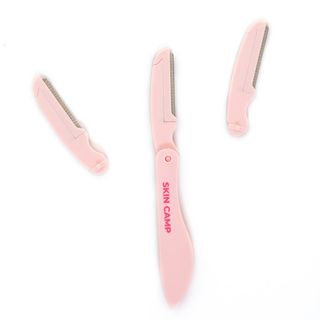
Kick peach fuzz to the curb with Skin Camp’s dermaplaning kit, which comes with two replacement heads and costs less than seven bucks.
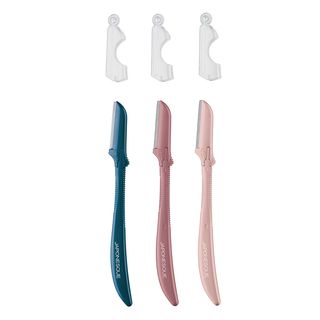
Though dermaplaning can be considered a more modern beauty trend in the States, Japanese women have been doing it for a really long time. This set of three razors are made with high quality stainless steel and are super sharp so your skin will feel immediately softer and fuzz-free.
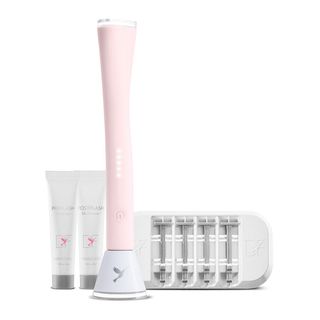
If you’re looking for something a little more gadgety, you’ll love the Dermaflash Luxe. The device uses a sonic vibration of two speeds to help exfoliate the skin and remove face fuzz, giving your complexion a glowy, brightening boost.
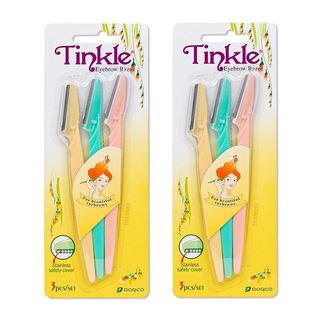
Want to test out dermaplaning with something more simple and less costly than a device? These cute Tinkle razors come in packs of three and are super easy to use. Just hold your skin taut and lightly shave away your dead skin!
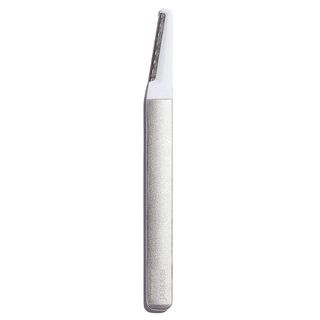
This popular dermaplaning tool promises to reduce the appearance of fine lines and visible pores, and can be used up to four times. It’s also environmentally sustainable as it’s made with a "virtually indestructible” aluminum handle.
Next: Sarah Hyland Talks Astrology, Beauty Faves, and Sharing Products With Her Fiancé

Marie has covered beauty, fashion, and lifestyle for almost 15 years. She contributes to the beauty section here at Who What Wear. Previously, she was the Looks Editor for Bust Magazine, built the beauty vertical at HelloGiggles as its beauty editor, and was a founding staff writer at Rookie mag, giving fashion advice to teens. Her bylines have appeared in The Cut, Allure, Glamour, The Hollywood Reporter, and more. She was born and raised in Southern California and is based in L.A. Marie is a self-proclaimed costume design nerd and a co-host of Makeover Montage, a podcast about fashion in film and costume design. You'll see her writing about her beauty obsessions: red lipstick, winged eyeliner, pink hair, nail art, and skincare for people over 40. When she's not working, she's playing with her dog, Gnocchi, and writing her style newsletter, Overdressed.

